Can I burn movies to a DVD for free? The answer is Absolutely Yes. You can burn movies for using software and tools available online. How can I burn movies to DVD and watch it on a DVD player? In this tutorial, you will learn about how exactly, read on.
Part 1. Why burn movies to DVD?
There are many reasons why we need to put movies onto DVD disc:
- Enjoy favorite movies on home DVD player and TV.
- Backup happy moment for long-term storage.
- Free up disc space for more files.
- Share your great times with families and friends.
- Even more.
Part 2. What do I need to burn movies to DVD?
Converting and burn movies to DVD is a simple process. If you get these items ready, you are good to burn DVDs:
- Blank DVD Disc: DVD±R (also DVD+/-R, or "DVD plus/dash R")) is the most popular format, you may get a blank DVD disc at Walmart, Amazon, or anywhere supermarket nearby.
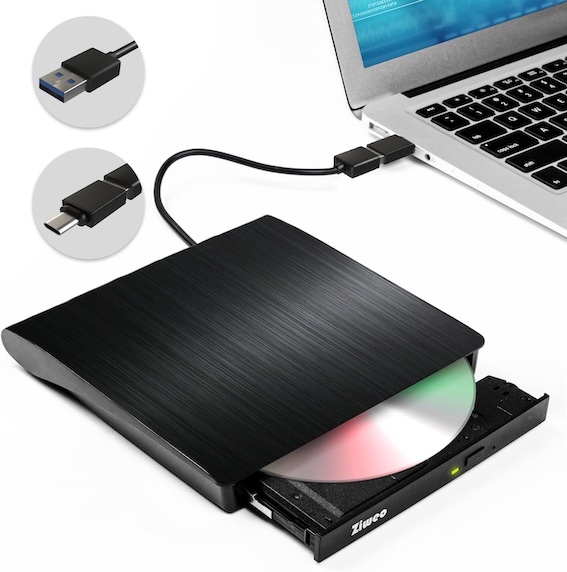
- DVD Burner: Also known as recordable DVD Drive. Most PC's especially laptops these days don’t have built-in DVD drives any more. Check your tech specs if you are not sure. If this is the case, you will need an external DVD drive that can read and write to DVD. Find one of these on Amazon or wherever you are available.
- DVD Burning Tool: Check if you have DVD burning software pre-installed on your computer (Windows DVD Maker or iDVD). If not, you will need to download and install a third-party DVD burning program to convert movie files to DVD. There are some free DVD authoring applications on the internet, check free DVD burners for more details.
Part 3. How do I convert and burn movies to DVD free?
Suppose you have got everything ready, now you may start the movie to DVD burning process. Here is the step-by-step guide on how to convert and burn movies on to DVD disc for free. What we use here is a totally free DVD burning software named DVDStyler which is very popular on the internet.
Step 1. Download and install DVDStyler
Visit DVDStyler’s official site and download the free DVD burning software according to your operating system, both Windows and Mac OS version are provided. Once you’ve done this, you may open the program. The program may look like this:
Step 2. Create a new project
• First, click on the new button below File or in the welcome dialog.
• Next, enter the disc label which will be displayed only on computer.
• Now select disc capacity based on your DVD disc.
• Select the video format. (NTSC is recommended for North American countries and Japan, PAL for all other.)
• Then click on OK button.
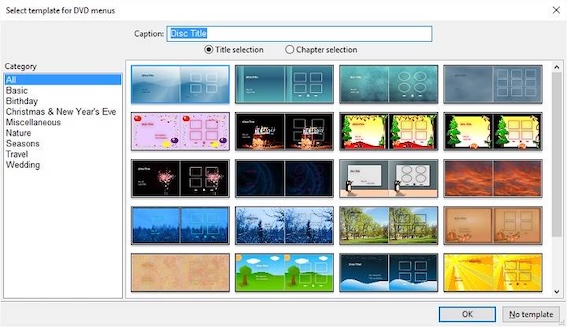
• Finally, enter a title for DVD disc. Also, you may select a menu template.
Step 3. Add movie files
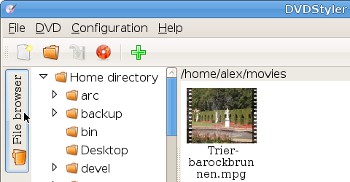
Click on the File Browser tab on the left side of the program window or simple click on the green + button. This will lead you to the directory wherever your movie files are. Select those movies that you want to burn on a DVD and add them into DVDStyler. Available space on DVD is displayed in the status line at the bottom of application window.

Step 4. Select a DVD menu(optional)
DVDStyler supports adding DVD menus. Click on the Background tab and choose one DVD menu from the built-in templates. If you want to use one of your own photos as the background, click on File Browser button to do it.
Step 5. Save the project and burn a DVD
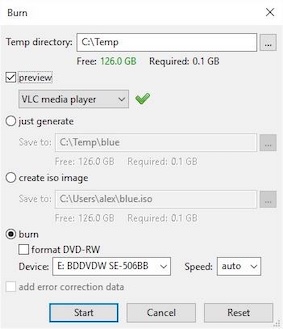
Once you are done with all settings, now you may click on Burn button and click on Start to start the movie to DVD burning process.
Step 6. Test the DVD
After burning test the DVD in a standalone DVD player or computer to ensure it works.
Part 4. How to burn movies to DVD effectively?
As we mentioned above, you can burn movies to DVD with free DVD Creator. There are also many other good DVD burning programs out there. Among them, we would like to recommend DVD Creator. For those not familiar with this tool, let me have a brief introduction: DVD Creator is able to convert and burn DVDs from almost any movie formats/photo files then you can enjoy them on home DVD players. It lets you create DVD menus and edit videos. All kinds of DVD format supported. The step by step guide below describes how to convert moveis to DVD disc using DVD Creator.
This is a totally clean program. There is no spyware or adware or malware. It's absolutely safe to install and to run!
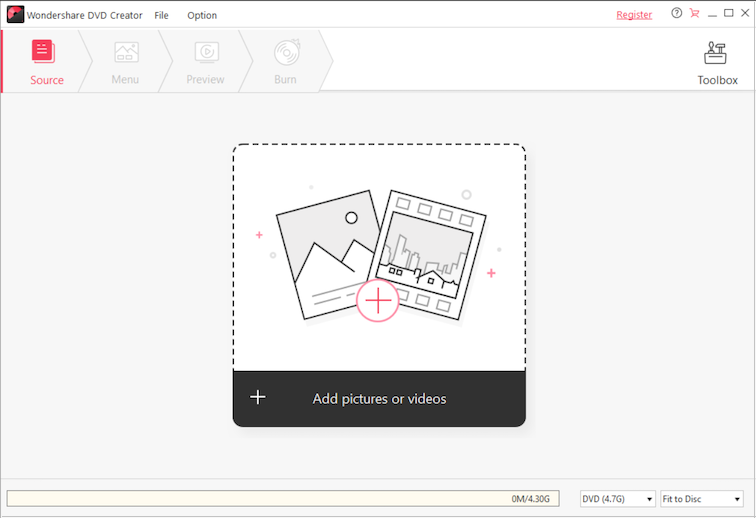
Click the + button to select input video files you want to convert to DVD. The size bar at the bottom indicates used/total space which the video files you’ve imported occupies on a DVD disc.
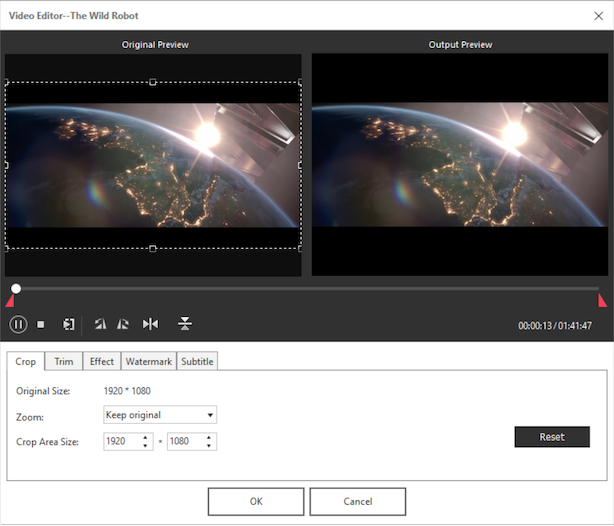
To make a real personalized DVD disc, sure you don’t wanna miss many various DVD menus built-in DVD Creator. Click on Menu button and you can do lots of things here: customize background image, music, add text, etc. (Note: This is an optional step, if you don’t want to customize DVD menus, please go directly to the next step.)
DVD players usually require the movie to be in a specific format (e.g., MPEG-2 for standard DVDs). Then click on Burn tab you will see the burn Windows where you can do the final settings: Name your DVD, number the copies, select a DVD burner and select the output: DVD disc, DVD folder, or ISO file. To convert video to DVD for playback on home DVD player, insert a blank DVD disc into your DVD Drive and finally click on Burn button.
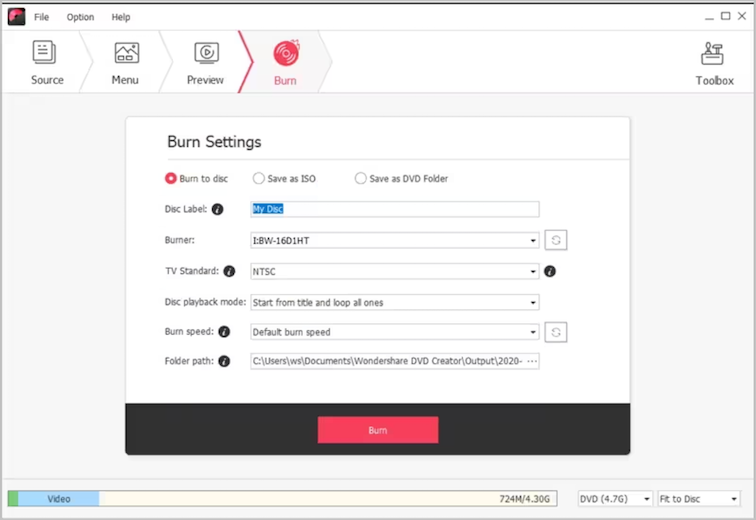
Once the burning process is done, the DVD disc will be ejected automatically and the DVD is ready to be played on home DVD player. Enjoy!
So, you have just learned how to convert videos to DVD with fast speed and super quality. With DVD Creator, you don’t have to convert videos yourself because this tool will take care of everything. In just a few clicks, you can convert videos to DVD with only one program. Go and give it a try. This DVD Creator supports DVD burning on Windows (including 11 and 10) and Mac OS.
Important Notes:
Copyright Issues: Burning copyrighted movies without permission may violate copyright laws. Ensure the movies you burn are legally obtained or free of copyright restrictions.
DVD Capacity: Standard DVDs can hold up to 4.7 GB. Use dual-layer DVDs for larger files (up to 8.5 GB).


